Getting Started
From Burstcoin security to wallet selection, the Getting Started guide provides the information needed to succeed.
Software
The definitive collection of open-source and easy to use software is located in the Burstcoin Software Library.
Documentation
Visit the Burstcoin Documentation Project for more information. Contribute new documentation or recommend improvements.
Faucets
Activate a new wallet for mining or to receive a transfer from Bittrex. Visit the Burstcoin Community Faucet list.
FAQs
Supporting new users, this section contains Frequently Asked Questions. Help curate by visiting the documentation section.
Burstcoin QBundle Installation and User Guide
Download and save the Burstcoin QBundle installation folder
- The installation folder is located here: QBundle Software on GitHub.
- GitHub is a software development platform and hosts the files needed for installation. Future releases will be located here as well.
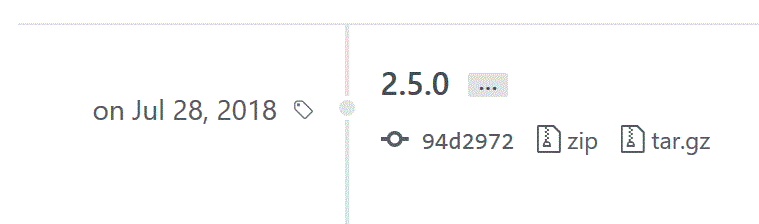
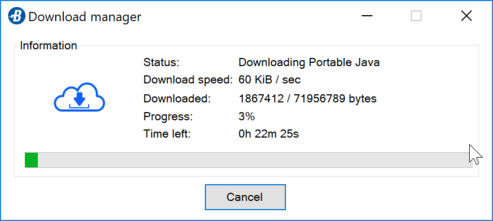
- Download and save the latest release. As of the writing, the latest release is version 2.5.0.
- When asked what you want to do with the folder, choose “save”.
- Locate the saved file in your downloads. A common location is C: Users/”user name”/downloads.
- Move the file to a permanent location. (C:Burstcoin or C:QBundle are good choices)

Extract the installation files
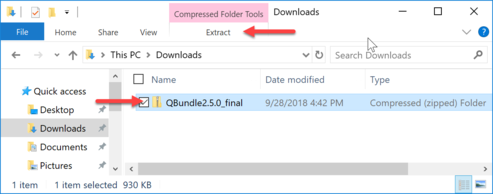
- Select the zipped QBundle folder and extract (unzip) the contents using the “Extract all” button.
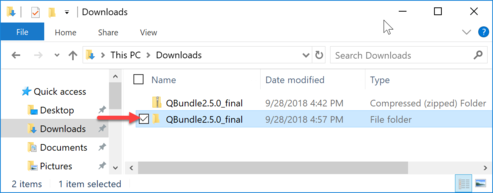
- After the unzipped version appears, you can delete the zipped folder, but this is not necessary.
Install the Burstcoin QBundle software
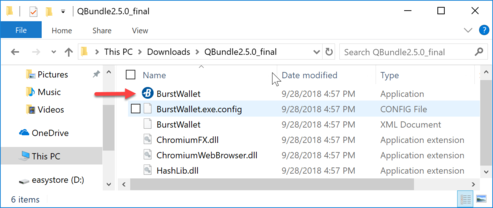
- Launch setup by opening the unzipped installation folder and double clicking on the following file: Name: BurstWallet Type: Application.
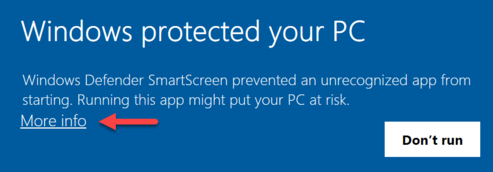
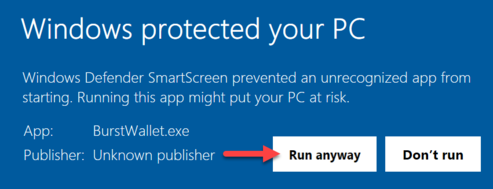
- Proceed through the warnings related to protecting your computer by clicking on “More Info”, followed by “Run Anyway”.
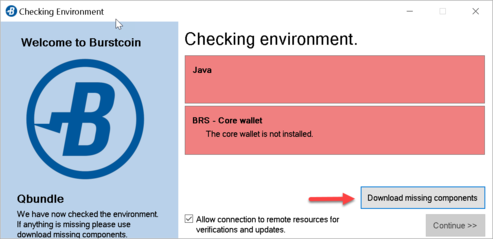
Download missing components
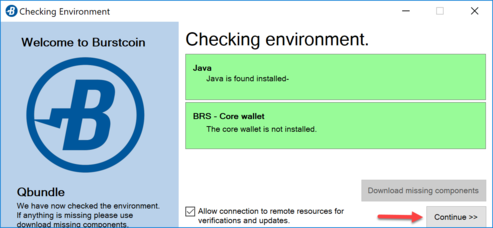
- The installation utility will check for portable Java and the BRS wallet.
- Verify that the check box for “allow connection to remote resources for verifications and updates” is checked.
- Click on “Download missing components”
- Several windows will appear as each component is downloaded and extracted. There may be several minutes between processes where your computer may seem inactive. Do not interrupt the process. The components are as follows: Portable Java, BRS - Core Wallet, and Chromium Pocket Browser.
- When all of the components have downloaded. Click on “Continue”.
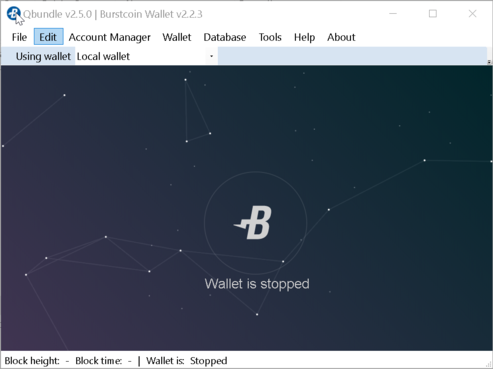
- Setup will complete and a new wallet will be displayed showing “Wallet is stopped”.
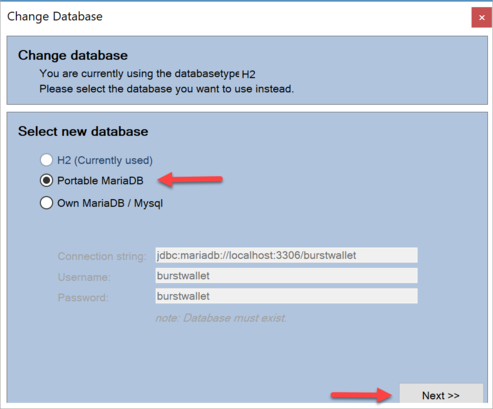
Change database to Portable MariaDB
- Select “Database” from the wallet’s top menu and select “Change Database”.
- Select the radio button next to “Portable MariaDB” and Click “Next”.
- Click “Yes” when asked if you want to download and install MariaDB.
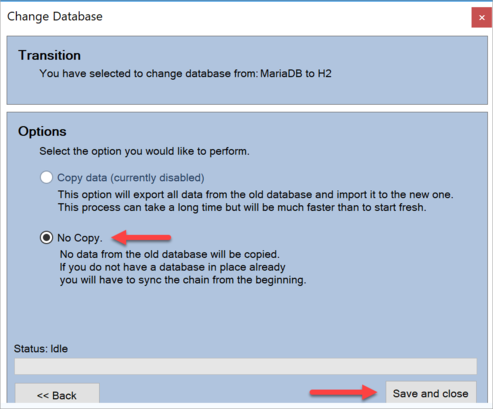
- After installation is complete, select “Database” from the top menu and verify that “No Copy” is selected.
- Click “Save and close”.

Java settings
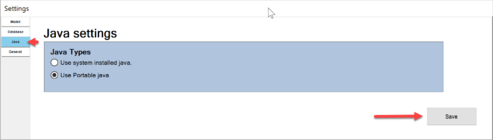
- Select “edit” from the top menu. The “settings” window will appear.
- Select “Java” in the left menu bar. Verify that the radio button for “Use Portable java” is selected.
- Save and exit.
Populate the database
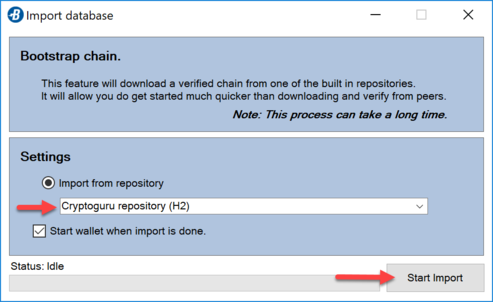
- Select “Database” from the top menu bar.
- Select “Bootstrap Chain”.
- In “Settings”, verify that “Cryptoguru repository” is selected.
- Click “Start Import”.
- You will receive a notice that all existing data in your database will be erased.
- Click “Yes” to continue.
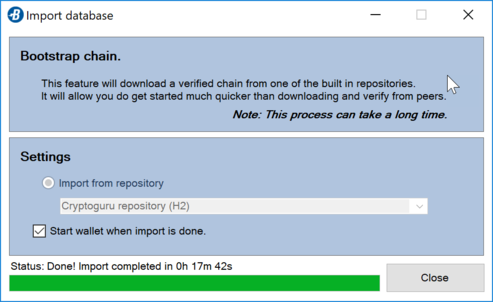
- Synchronization will begin. Wait for it to complete. Current block time will appear in orange while synchronizing, and green when compete.
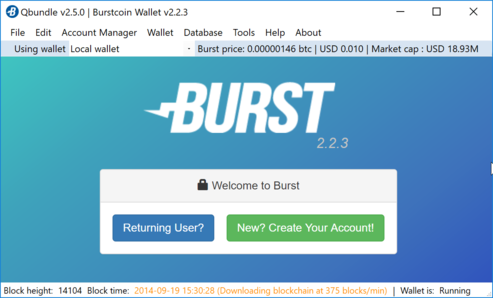
Create a new account and passphrase
- Please note: Before proceeding, it is important to fully understand the security features of Burstcoin passphrases. Review the getting started guide for information about securing your Burstcoin.
- Click on “New? Create Your Account”.
- A 12 word passphrase will be generated. This is the only opportunity that you will have to modify this passphrase. It is not necessary but additional characters or numbers can be added. Never shorten the passphrase or change the random words provided.
- Record the passphrase on paper, including any modifications that you have made. Click “Next”.
- Type the passphrase, exactly as you have recorded it in the verification box.
- Click “Next” to open wallet.
- Record the account number from the top left corner. Account numbers are alphanumeric and have five segments starting with “BURST”.
- Click on “Wallet” and then on “Stop Wallet”.
- Restart wallet by clicking on “Wallet” and “Start Wallet”.
- Test your passphrase. Clicking on “Returning user?” and enter your passphrase. Click on the arrow to the right.
- The account number displayed should match your account number. If it does, you have successfully completed setup. If it does not, you have entered your passphrase incorrectly and should try again.
- Please note: An Incorrect passphrase will generate a new account number. If this occurs, simply close the wallet and try again.
Install additional Burstcoin QBundle applications
Following are several useful programs that are included with QBundle.
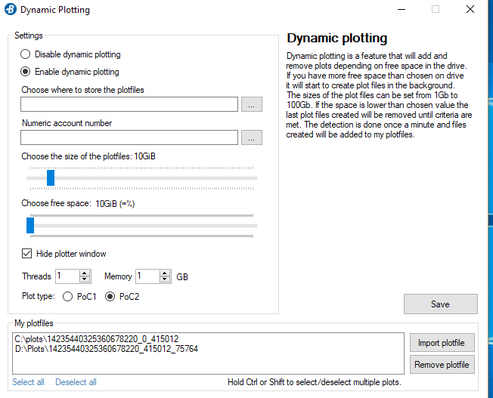
Dynamic plotting creates and deletes plot files automatically while allowing for normal usage of a hard drive. It will check every minute for space pressure. A limited but dynamic amount of space on the hard drive is reserved for normal usage. A user can set specify the amount to be reserved. If users often move or create files that are large, they should set a greater amount of space to be reserved.
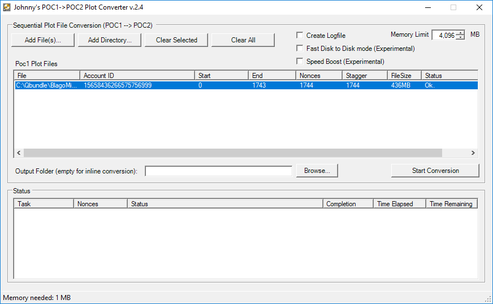
Johnny’s POC1 -> POC2 converter is a tool for converting POC1 plot files into POC2 plot files. New users will not need to use this tool. The POC1 to POC2 conversion completed at block height 502000. POC1 plot are no longer supported for mining. Users who have existing POC1 plots can use them for mining if they use a POC2 compliant miner which can perform on-the-fly conversion. Read speeds will be 50% slower using POC1. Plots that are being converted must be temporarily excluded from mining. Usage of the plot converter is straightforward: First, select plot files for conversion and then click on “Start conversion”. Note: The application will not allow plot files of other types to be added to the conversion queue.
Users can perform inline conversion, which does not require additional free space, or can save the converted plot file to a new location. To save to a new location, use the “Output Folder” setting. Once the “Start conversion” has been activated, stopping the conversion process may lead to damaged plots which cannot be repaired. Many miners have chosen to re plot their drives for POC2 rather than use the conversion process.